To install the Sonargraph Eclipse plugin, run Eclipse and open menu → . Add this update site as a new location: https://eclipse.hello2morrow.com/SonargraphEclipse.site
After successful installation and a restart of Eclipse the additional menu entry "Sonargraph" should be visible.
If not, check the Eclipse "Error View" for any errors related to the plugin and get in contact with <support@hello2morrow.com>.
NOTE
Installing Sonargraph Eclipse plugin on Eclipse Oxygen with an already installed Groovy plugin may lead to some
Eclipse editors or views
showing errors after a restart of Eclipse, due to Groovy plugin's compiler resolver being broken when there are
multiple Groovy compiler bundles
for the same Groovy compiler version.
In this case it may help to delete the Groovy compiler bundle introduced by Sonargraph Eclipse plugin from plugins
folder of your Eclipse Oxygen installation.
If you need further assistance please get in contact with <support@hello2morrow.com>.
TIP
Occasionally, Eclipse gets confused after installing plugins. If Eclipse fails to startup, configure the "-clean" startup option in the eclipse.ini file within you Eclipse installation. This will clear any cached data. If the slightly longer startup time bothers you, remove the option again. More details are available here: https://help.eclipse.org/index.jsp?topic=%2Forg.eclipse.platform.doc.isv%2Freference%2Fmisc%2Fruntime-options.html
Activation
You need to have a valid license or activation code in order to use the plugin. More details can be found in Chapter 3, Licensing. Open the dialog via the menu → and supply either the activation code or license file and hit "Request".
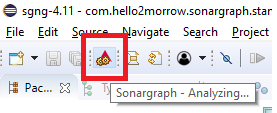
The Sonargraph icon in the Eclipse toolbar indicates the current status of the plugin and its tooltip provides additional information. This makes it easy to spot, if the plugin is still analyzing, if there are any issues, etc.
The following sections describe common interactions and usage of the plugin.
NOTE
The IDE must be started with a Java 21 (or higher) runtime for the integration to work.
We tested the plugin successfully with Eclipse 4.32.0. If you notice any compatibility problems during installation,
please send us the Eclipse error log or a screenshot of the error and details about your Eclipse installation
to <support@hello2morrow.com>.
